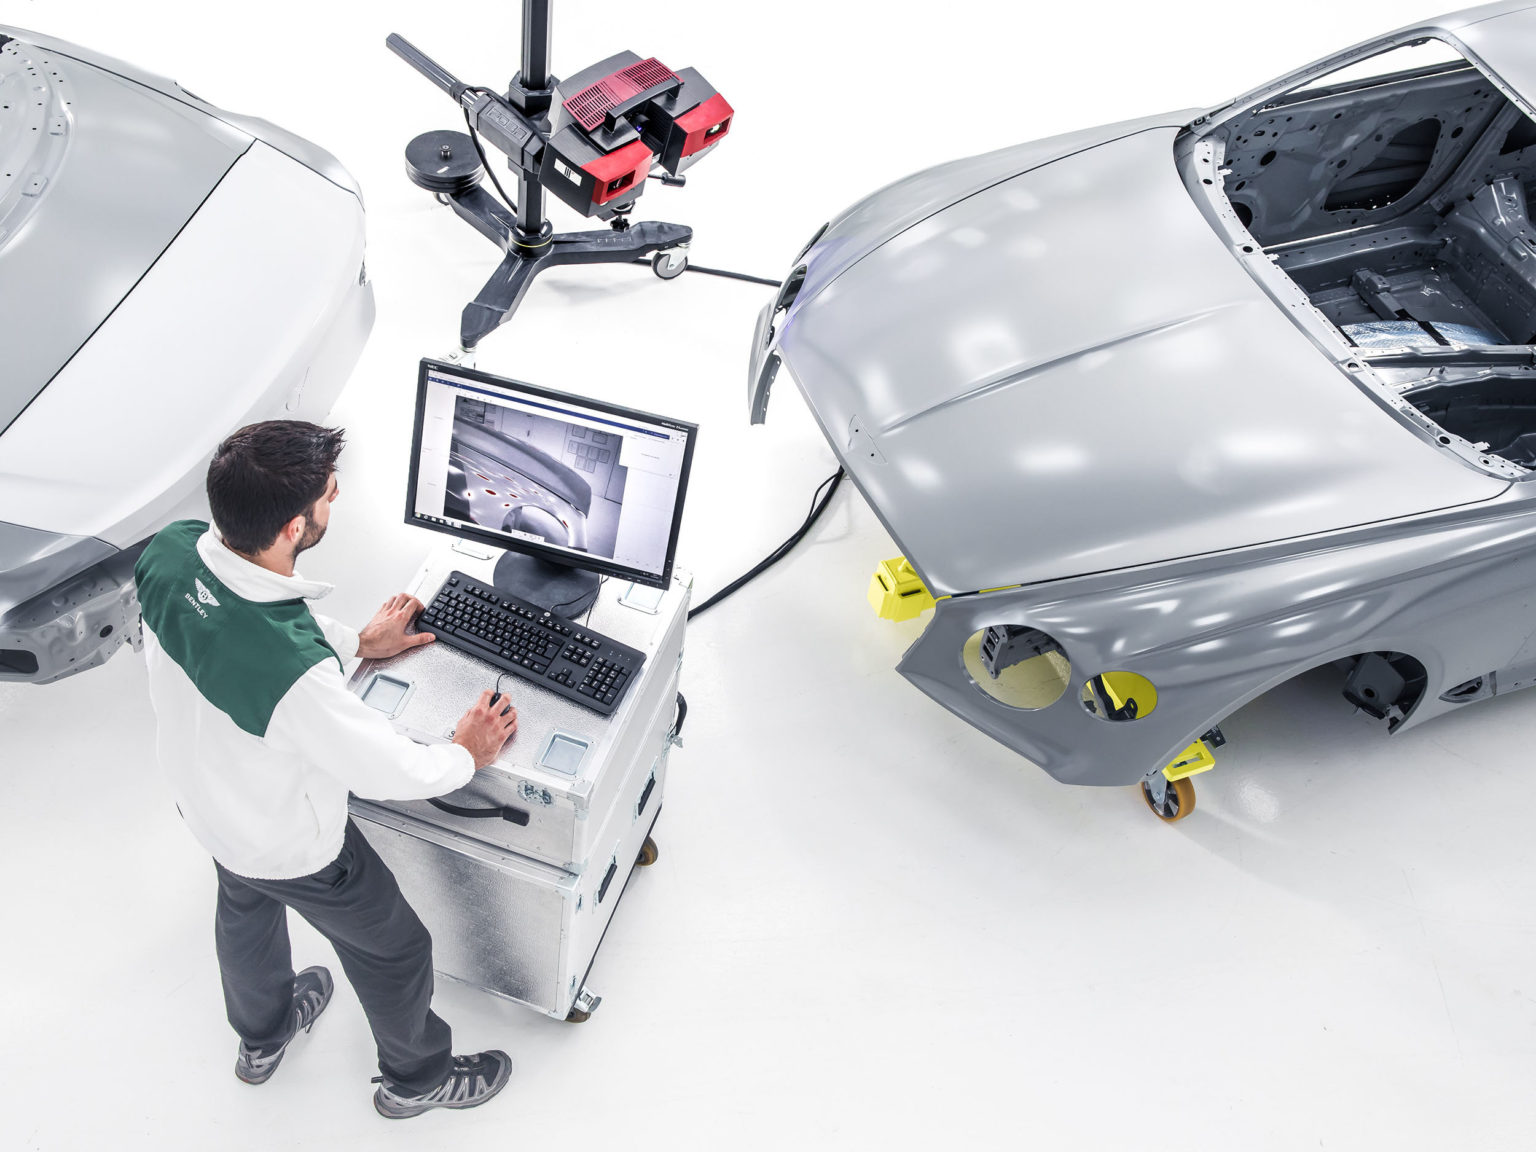
In a factory in Crewe, Cheshire, England, sits a large air-conditioned workshop hidden away from visitors. Inside sits an array of precision instruments that would be right at home in a university science lab or space agency. This is the Bentley metrology lab.
Metrology is the science of measurement. Its name isn’t fancy, but its precise work is of the utmost importance.
Bentley employee Michael Stockdale, Head of Metrology, runs the lab working with 25 colleagues to measure Bentley vehicles ensuring the most precise measurements possible.
A team of scientists work together to ensure precise measuring takes place and that any variation in production are within acceptable tolerances.Photo courtesy of Bentley Motors
In the U.S., such labs are frequently found as a part of a government institution. The Kansas Metrology Laboratory falls under the jurisdiction of the Kansas Department of Agriculture. The same goes for facilities in Texas and Nevada while South Dakota’s falls under the Department of Public Safety. There are also private metrology labs that service clients worldwide.
Bentley’s lab is specialized.
It is capable of measuring every part of each model Bentley produces – even the concept cars, from the smallest washer to large body panels and interior trim components. “We have the tools to measure everything from the graining of leather to the surface of a cylinder bore, down to fractions of a micron” said Stockdale.
Why? To ensure that the vehicles are not out of alignment with the allowable tolerances. When components are measured individually, it is easy to see where an error may be occurring during production. This allows problems to be pinpointed during assembly and can result in a more precise vehicle arriving at dealerships and less recalls down the road.
There are instruments within Bentley’s metrology department that can measure down to 0.5 microns. A micron is one millionth of a meter, and a human red blood cell is 5 microns in diameter. Not every component of a Bentley needs to be measured to tolerances of less than a micron, but there are some.
The Flying B mascot is made of several intricate components.Photo courtesy of Bentley Motors
Take, for example, the Bentley Flying B mascot that rides on the hood of the Flying Spur. It smoothly moves up into the environment and then retracts into a safe space below the bonnet. That simple up-down maneuver requires the proper working mechanics of a series of intricate parts that come together in very close quarters. To achieve this precise choreography and to ensure that it sits perfectly centered within its plinth, elements of the Flying B system have tolerances as low as 0.15 millimeters. If one component is just a little bit off, it can disable the entire operation.
The engine has some of the most complex and microscopic components. The company describes their 6.0-litre W12 engine, “Spinning at up to 6,000 rpm, the crankshaft converts the immense downward forces generated by the pistons into rotary movement that powers the wheels. Though invisible to the naked eye, each of the twelve machined bearing journal surfaces in which the crankshaft sits features minute grooves that hold a microscopic film of oil.”
By using a Perthometer (a tool designed to measure surface finishes), the Stockdale-led metrology team can verify that those minute grooves are within their defined tolerances.
The lab also contains a fleet of digital cameras that are able to photograph a vehicle at every angle to create a precise map for duplication. This map then serves as a template as the vehicle is carved out of a single piece of aluminum.
“Imagine an issue at the prototype stage where the panel gap between grille and bonnet is a millimetre too large,” said Stockdale. “Does the fault lie with the grille, or the bonnet? The cubing reference vehicle provides the answer, because it’s made to the precise dimensions of the CAD data.”
This machine can be equipped with tactile probes for scanning accuracy and a variety of optical sensors for non-contact measurements.This machinery retails for over $100,000.Photo courtesy of Bentley Motors
Soft surfaces, such as interior upholstery, are read by an optical laser.
Bentley keeps its lab at a comfortable 68 degrees at all times allowing for accuracy in all measurements and preventing shrinkage and expansion due to environmental conditions. Certain tools, however, require an even higher level of precision.
The metrology lab features a High Accuracy Measurement area, which Bentley refers to as its “inner sanctum”. There, a dedicated climate control system ensures that the temperature never deviates by more than half a degree Celsius. Within this area are three gigantic granite blocks to which components can be clamped for the ultimate in stability, essential for an accurate reading. But first, the components to be measured have to soak in the atmosphere – literally. “A large component like an engine block might have to soak at a consistent temperature for up to a week, so we can be sure that it’s 20°C all the way to the core” said Stockdale.
A disc brake is measured inside the metrology lab.Photo courtesy of Bentley Motors
Bentley calls the metrology department its “hidden heroes” saying, “Every Bentley that leaves the factory is a tribute to their unseen contribution.”


